MySQL is one of the most popular open-source relational database management systems (RDBMS). It is widely used by developers and business owners alike as it is efficient, secure, and easy to use. However, uploading MySQL to a server can be confusing for beginners. In this article, we will guide you through 30 simple steps to upload MySQL to a server.
Step 1: Select a Hosting Company
The first step to uploading MySQL to a server is to select a hosting company with MySQL support. Look for a company that offers services like cPanel and phpmyadmin, as these tools make the process of uploading MySQL a lot easier.
Step 2: Purchase Hosting
Once you have selected your hosting company, purchase a hosting plan that includes MySQL support. You will be able to choose from shared, VPS or dedicated hosting plans based on your server requirements.
Step 3: Access cPanel
Access your hosting account’s cPanel by logging in with your credentials. In the cPanel dashboard, you will find various tools like FTP Manager, File Manager, MySQL Databases, etc.
Step 4: Create a New Database
Click on ‘MySQL Databases’ and create a new database. You need to give it a name and set the username and password for access.
Step 5: Add User to Database
After creating a new database, add a user to it. Set the username and password for this user.
Step 6: Grant User Privileges
Granting user privileges allows the user to access and modify the database. In MySQL Databases, scroll down to ‘Add User to Database’ and select the user from the drop-down.
Step 7: Assign Database Privileges
Assign database privileges to the user you have just created. You can choose ‘ALL PRIVILEGES’ or ‘SELECTED PRIVILEGES’ based on your requirements.
Step 8: Download MySQL Client
Download the MySQL client from the official MySQL website. You can choose the client based on your operating system.
Step 9: Install MySQL Client
Install the MySQL client on your local system by following the installation wizard.
Step 10: Open Command Prompt
Open the Command Prompt on your local system by typing ‘cmd’ in the Run command.
Step 11: Navigate to MySQL Bin Folder
Navigate to the MySQL bin folder by using the command ‘cd /path/to/mysql/bin’. Replace ‘path/to/mysql/bin’ with the actual path.
Step 12: Type MySQL Command
Type the MySQL command in the Command Prompt. You will be prompted for the username and password of the database.
Step 13: Create Tables
Create tables inside the database using SQL commands. This will help you manage data efficiently.
Step 14: Export the Database
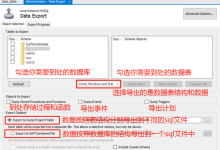
Export the database using phpMyAdmin or cPanel’s Backup Wizard. Choose the SQL format to save the database in a file.
Step 15: Upload the File
Upload the file to the hosting server using FTP or cPanel’s File Manager.
Step 16: Access the Server
Access the server using SSH or cPanel’s Terminal. You can use PuTTY or Terminal to access the server.
Step 17: Navigate to MySQL Bin Folder
Navigate to the MySQL bin folder on the server using the command ‘cd /path/to/mysql/bin’. Replace ‘path/to/mysql/bin’ with the actual path.
Step 18: Create a New Database
Create a new database on the server using the same name you used on your local system.
Step 19: Import the Database
Import the database using the SQL file you uploaded to the server.
Step 20: Edit the Config File
Edit the configuration file of your application to point to the new database on the server.
Step 21: Check the Connection
Check the database connection by running a sample query in the application. If it works, the connection is successful.
Step 22: Create a User Account
Create a user account for your application and grant it privileges in the server’s MySQL database.
Step 23: Update the Config File
Update the configuration file of your application to use the new user account detls.
Step 24: Upload the Application
Upload your application to the server using FTP or cPanel’s File Manager.
Step 25: Set Permissions
Set permissions for the files and directories of the application using the chmod command.
Step 26: Start the Application
Start the application on the server using the command line interface or cPanel’s File Manager.
Step 27: Test the Application
Test your application to make sure it is working properly on the server.
Step 28: Monitor the Server
Monitor the server to ensure that it is running oothly and all your data is secure.
Step 29: Regular Backups
Perform regular backups of your database and application data to prevent data loss.
Step 30: Regular Mntenance
Regularly mntn your database and application by updating the software and fixing any issues that arise.
Conclusion
Uploading MySQL to a server may seem like a daunting task, but by following these 30 simple steps, you can do it easily. Remember to take your time and follow each step correctly to ensure a ooth and successful upload. Happy uploading!
相关问题拓展阅读:
- mysql数据库如何上传到指定服务器
mysql数据库如何上传到指定服务器
两种方法:
一是mysqldump把数据库转换为SQL文件,然后在服务器的数据库上执行这陪腊散个SQL既可
二芦氏是把MYSQL的数据库文件拷贝到服务器的数据库文件目录局旅下,如果是UNIX,这个操作需要系统特权
如楼上,推荐之一种。
但注意用户权限问题。
关于mysql 上传到服务器上的介绍到此就结束了,不知道你从中找到你需要的信息了吗 ?如果你还想了解更多这方面的信息,记得收藏关注本站。

 国外主机测评 - 国外VPS,国外服务器,国外云服务器,测评及优惠码


