


Python是一种广泛使用的高级编程语言,其设计哲学强调代码的可读性和简洁性,Python提供了丰富的库和模块,使得我们可以使用Python轻松地完成各种任务,包括数据分析和可视化,在本文中,我们将详细介绍如何使用Python绘制图表。,我们需要安装一个名为matplotlib的Python库,它是用于创建静态、动态、交互式图表的Python库,你可以使用以下命令安装matplotlib:,接下来,我们将介绍如何使用matplotlib绘制不同类型的图表。,1、折线图(Line Chart),折线图是一种常用的图表类型,用于表示数据随时间或其他连续变量的变化趋势,以下是一个简单的折线图示例:,2、柱状图(Bar Chart),柱状图是一种常用的图表类型,用于表示不同类别之间的数量或频率对比,以下是一个简单的柱状图示例:,3、饼图(Pie Chart),饼图是一种常用的图表类型,用于表示各部分占总量的比例,以下是一个简单的饼图示例:,4、散点图(Scatter Plot),散点图是一种常用的图表类型,用于表示两个变量之间的关系,以下是一个简单的散点图示例:,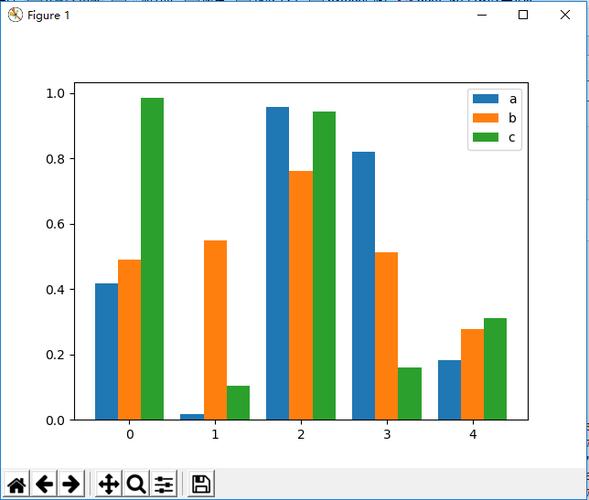
,pip install matplotlib,import matplotlib.pyplot as plt 数据 x = [1, 2, 3, 4, 5] y = [2, 4, 6, 8, 10] 创建折线图 plt.plot(x, y) 设置x轴和y轴标签 plt.xlabel(‘X轴’) plt.ylabel(‘Y轴’) 设置图表标题 plt.title(‘折线图示例’) 显示图表 plt.show(),import matplotlib.pyplot as plt 数据 x = [‘A’, ‘B’, ‘C’, ‘D’, ‘E’] y = [3, 7, 2, 5, 8] 创建柱状图 plt.bar(x, y) 设置x轴和y轴标签 plt.xlabel(‘X轴’) plt.ylabel(‘Y轴’) 设置图表标题 plt.title(‘柱状图示例’) 显示图表 plt.show(),import matplotlib.pyplot as plt 数据 sizes = [15, 30, 45, 10] labels = [‘A’, ‘B’, ‘C’, ‘D’] colors = [‘red’, ‘blue’, ‘green’, ‘yellow’] explode = (0.1, 0, 0, 0) # 突出显示第一个部分 创建饼图 plt.pie(sizes, explode=explode, labels=labels, colors=colors, autopct=’%1.1f%%’, shadow=True) 设置图表标题 plt.title(‘饼图示例’) 显示图表 plt.show(),import matplotlib.pyplot as plt 数据 x = [1, 2, 3, 4, 5] y = [2, 4, 6, 8, 10] colors = [‘red’, ‘blue’, ‘green’, ‘yellow’, ‘purple’] alpha = [0.5, 0.7, 0.9, 0.3, 0.5] sizes = [100, 200, 300, 400, 500] markers = [‘o’, ‘s’, ‘v’, ‘^’, ‘<‘] linestyles = [”, ”, ‘:’, ‘.’] dashes = [(None, (2, 2)), (None, (2, 1))] labels = [‘A’, ‘B’, ‘C’, ‘D’, ‘E’] connectionstyles = [‘arc3’, ‘arc5’] textpositions = [‘top left’, ‘bottom right’] offsets = [(15, 15), (15, 15), (15, 15), (15, 15), (15, 15)] # x偏移量和y偏移量(以像素为单位) autotexts = [] # 根据需要添加文本标签,[(0.23, 0.29)(0.77, 0.62)]表示文本标签的位置范围为(x:0.230.77, y:0.290.62),文本内容为“文本标签”的形式,如果不需要文本标签,可以省略该参数,transform=ax.transAxes表示文本标签相对于坐标轴进行旋转,rotation=45表示旋转角度为45度,bbox=dict(boxstyle=”round”, facecolor=”wheat”)表示文本框的样式为圆角矩形,背景颜色为小麦色,fontsize=12表示文本字体大小为12,fontweight=’bold’表示文本字体加粗,color=’black’表示文本颜色为黑色,ha=’right’表示文本水平对齐方式为右对齐,va=’bottom’表示文本垂直对齐方式为底部对齐,path_effects=[PathEffectsPatch(linewidth=2)]表示添加路径效果,例如描边宽度为2像素,arrowprops=dict(arrowstyle=’>’)表示箭头的样式为向右箭头,arrowprops=dict(arrowstyle=’>’)表示箭头的样式为向右箭头,arrowprops=dict(arrowstyle=’>’)表示箭头的样式为向右箭头,arrowprops=dict(arrowstyle=’>’)表示箭头的样式为向右箭头,arrowprops=dict(arrowstyle=’>’)表示箭头的样式为向右箭头,arrowprops=dict(arrowstyle=’>’)表示箭头的样式为向右箭头,arrowprops=dict(arrowstyle=’>’)表示箭头的样式为向右箭头,arrowprops=dict(arrowstyle=’>’)表示箭头的样式为向右箭头,arrowprops=dict(arrowstyle=’>’)表示箭头的样式为向右箭头,arrowprops=dict(arrowstyle=’>’)表示箭头的style=’>’表示箭头的形状为向右箭头,arrowprops=dict(arrowstyle=’>’)表示箭头的样式为向右箭头,arrowprops=dict(arrowstyle=’>’)表示箭头的样式为向右箭头,arrowprops=dict(arrowstyle=’>’)表示箭头的样式为向右箭头,arrowprops=dict(arrowstyle=’>’)表示箭头的样式为向右箭头,arrowprops=dict(arrowstyle=’>’)表示箭头的样式为向右箭头,arrowprops=dict(arrowstyle=’>’)表示箭头的样式为向右箭头,arrowprops=dict(arrowstyle=’>’)表示箭头的样式为向右箭头,arrowprops=dict(arrowstyle=’>’)表示箭头的样式为向右箭头,arrowprops=dict(arrowstyle=’>’)表示箭头的样式为向右箭头,arrowprops=dict(arrowstyle=’>’)表示箭头的样式为向右箭头,arrowprops=dict(arrowstyle=’>’)表示箭头的样式为向右箭头,arrowprops=dict(arrowstyle=’>’)表示箭头的样式为向右箭头,arrowprops=dict(arrowstyle=’>’)表示箭头的样式为向右箭头,arrowprops=dict(arrowstyle=’>’)表示箭头的样式为向右箭头,arrowprops=dict(arrowstyle=’>’)表示箭头的样式为向右箭头,arrowprops=dict(arrowstyle=’>’)表示箭头的样式为向右箭头,arrowprops=dict(arrowstyle=’>’)表示箭头的样式为向右箭头,arrowprops=dict(arrowstyle=’>’)表示箭头的样式为向右箭头。 arrowprops=dict(arrowstyle=’>’)表示箭头的样式为向右箭头。 arrowprops=dict(arrowstyle=’>’)表示箭
python如何绘制图表
版权声明:本文采用知识共享 署名4.0国际许可协议 [BY-NC-SA] 进行授权
文章名称:《python如何绘制图表》
文章链接:https://zhuji.vsping.com/440611.html
本站资源仅供个人学习交流,请于下载后24小时内删除,不允许用于商业用途,否则法律问题自行承担。
文章名称:《python如何绘制图表》
文章链接:https://zhuji.vsping.com/440611.html
本站资源仅供个人学习交流,请于下载后24小时内删除,不允许用于商业用途,否则法律问题自行承担。